Summer Update, Equipment, etc.

It’s past time for an update on this blog, and I apologize to my readers (if any are left!) that it’s been so long since my last post. While things have gone well the past several months, I – like everyone else – am looking forward to returning to “normal” as soon as is safely possible. The mood in my state and region is more positive now than it’s been in a long time, which is of course encouraging.

Equipment – A New Horn!

While I’ve played on Geyer/Knopf-style horns for the majority of my career, I appreciate many (though not all) of the qualities of large-bell, i.e. Kruspe-style, horns. I recently got the chance to try one of Yamaha’s Kruspe horns, the YHR 668II, and have been enjoying it a lot! It blows differently than my YHR 671, but there are some interesting similarities as well. Ergonomically the two instruments feel similar in my left hand, despite the design differences. The 668II takes a bit more air, but I am able get some brassiness in the sound when desired. If you compare images of the Yamaha 668II and the Conn 8D, you’ll notice the similarity of design. It’s not just been years, but decades since I last played an 8D, so I can’t really compare it with the Yamaha. Here’s a very brief audio sample from a recording I made for IHS 53. The excerpt is from Roger Jones’s Sketchbook for Horn and Piano.

Excerpt from Sketchbook for Horn and Piano, by Roger Jones

While I’m still adapting to this instrument, I’m having a great time doing it. One thing I discovered early on is that the 668II responds better to a mouthpiece with a slightly larger bore. In my case I switched from the Houser San Francisco model I was using on the 671 (#14 bore) to the Houser Standley GS12 model (#12 bore), keeping the same rim (Houser E model, 17.5mm). The Standley cup is slightly different than the San Francisco, so that may have impacted the results as well. The Standley model is not new for me, as I played on one for several years before making the move to the San Francisco. I won’t be selling my Geyer-style horn any time soon, but for the time being I plan to keep playing the big-bell horn regularly. If you’re in the market for a large-bell horn, the Yamaha 668II is worth a look.

IHS

This month marks my first year as Publications Editor for the International Horn Society. It continues to be an honor and privilege to serve the IHS in this position, especially following Bill Scharnberg’s 17-year tenure! I’m excited about the variety and number of articles that have been and continue to be submitted. Be sure to check out the May issue of The Horn Call if you have not done so already. On a related note, episodes of The Horn Call Podcast are available at podcast.hornsociety.org, and can also be found on Apple Podcasts and other major podcast outlets. As of this post, 13 episodes have been published (10 regular and 3 “bonus” episodes), with a total of 2,380 downloads. Given the niche market for this podcast, I think this is a respectable number. Guests so far have included: Andrew Pelletier, Ricardo Matosinhos, Gina Gillie, Margaret Tung, Jena Gardner, David Krehbiel, Frøydis Ree Wekre, John Ericson, Jonas Thoms, Albert Houde, Jeffrey Agrell, James Naigus, Drew Phillips, and Katy Ambrose. If you enjoy the podcast medium I hope you’ll subscribe to The Horn Call podcast. It is my hope it will serve as a bridge between IHS membership, content creators, and IHS leadership. It has been a pleasure speaking with each and every guest!

Summer Projects

In terms of teaching and performing obligations, this summer will be very light for me, but I have several other projects in the works. One is a book project for Mountain Peak Music, and another is a commissioning project. More details on both in future posts, I promise! Up next week is a woodwind quintet performance for the 5th annual New Music on the Bayou Summer Festival. If you are a fan of new music, be sure to check out the live-streams of these concerts. I’ve also submitted three pre-recorded videos for IHS 53: a solo performance – which includes the world premieres of works by Douglas Hill and Roger Jones – a ULM Horn Ensemble performance, and a presentation on burnout. The burnout presentation was originally scheduled for IHS 52 (which was cancelled), but it seemed just as appropriate this year! All three will be available to those who register for the symposium, which is scheduled for August 9-13, 2021.

I hope everyone has a lovely summer with plenty of rest and relaxation!

Comparing Microphones for Recording Solo Horn

Here’s a video comparing three different ways to record a solo horn.

  1. MXL R144 Ribbon Microphone – placed approximately 6 feet in front of the horn.
  2. Samson C02 Condenser Microphones – stereo pair in XY configuration placed approximately 6 feet in front of the horn.
  3. Samson C02 Condenser Microphones – stereo pair in NOS configuration placed approximately 6 feet in front of the horn.

The above are three common microphone techniques. There are many more, but my limited skills and equipment prevented me from exploring others.

This little project came about for three main reasons:

  • While I am most certainly not a recording engineer, I teach an Introduction to Music Technology course, and have an interest in recording techniques. I enjoy learning about the equipment and principles, and used this video as a way to put some ideas into practice.
  • Back to back comparison of the two types of microphones I own – ribbon and condenser. I’ve used both in various situations, but had not compared them in this way. For more information on microphones, see here.
  • I also wanted to try out a new way of recording – using independent audio and video equipment, rather than the all-in-one approach I have used for years. Though it took a little more time to set up, I think the end product was pretty successful. Syncing up the audio and video was less tricky than I anticipated.

Before getting into more discussion of the results, here’s the video. Separate audio files are also embedded if you would prefer to listen to those. I chose an excerpt from Otto Ketting’s Intrada because I’m performing it in a few weeks, and also because it has lots of contrast in a short amount of time.

Ribbon:

Condenser Pair XY:

Condenser Pair NOS:

Even with the extremely low cost equipment I am using, hopefully you can hear a difference among the three techniques. To me, the XY configuration has the best overall sound, although there are elements of the ribbon that I like quite a bit. Ribbon microphones are very popular for recording brass instruments, because of the warmth they bring to the sound. Higher quality microphones should of course yield more perceptible results, although my cheap MXL ribbon is ok for my purposes. I hope to do some more videos like this in the future, with different techniques and ensembles. In case you are interested, here is the equipment I used (microphones are listed above). Assuming you have a decent laptop, all of the other gear is very reasonably priced.

  • Audio Interface/Preamps: Focusrite Scarlett 2i2
  • Computer: 13 inch, MacBook Pro, ca. 2012
  • DAW: Logic Pro X
  • Video Camera: Canon Vixia, ca. 2009
  • Video Editing: Final Cut Pro X

While there are some great all-in-one recording products out there, if you do lots of audio and video recording of your horn playing it might be worth exploring some of this equipment.

Gear Reviews: Stand Light, Bluetooth Speaker

Two items I’ve recently added to my gear bag are a battery-powered stand light and a Bluetooth speaker. I initially purchased each of these items for specific purposes, but have found them so useful on a day-to-day basis that I thought it would be worth sharing. Click on the image or name of each product for a link.

Kootek Clip-On Book Light

I originally bought three of these to use for our brass trio recording back in January. Most stage lights make noise, so the lighting during a recording session needs to be minimal. They came in very handy for the session, and for several other performances afterwards. The multiple LED bulbs have two brightness settings, and the battery life is quite good, several hours per charge. Charging takes a few hours, and it comes with a USB charger and A/C adapter. One note about these lights is that they should NOT be operated while plugged in, as it can damage the battery. The base includes a large clip for attaching to a music stand, but it is also sturdy enough to allow the light to stand on its own for table or desktop use. For the price these are great lights!

Bose SoundLink Micro

I picked up this speaker to use in a “Smart” classroom that was having technological difficulties with the sound system. It was a bit of an impulse buy, and I wasn’t entirely sure what I was getting. I wanted something powerful, but still portable enough to stick in my bag and lug back and forth to various classrooms. This was the first Bose product I’ve owned, but the company is well known for their high end speakers and noise-cancelling headphones. I also figured that if the speaker turned out to be a dud or simply not right for my purposes I could always return it. As it turns out, this device has become one of my most-used pieces of technology. Its dimensions (3.87″ H 3.87″ W 1.37″) make the SoundLink Micro incredibly portable, and the rubberized outer layer protects it from the inevitable bumps and scrapes that come with frequent use. It is advertised as waterproof, but I have not had the opportunity to put that claim to the test. In addition to classroom use, I use it regularly in my practice sessions at home, as well as in sectionals and chamber music rehearsals to play my metronome and tuning drones. It connects very quickly to a smartphone and/or laptop. Battery life is excellent, and setting up the Bluetooth connection is fast and easy. However, the best feature of this speaker is the sound. You really do need to hear it to believe the size and volume that it can produce. It will fill a room – not as well as a full-blown stereo system, of course – but what it lacks in power it more than compensates for in portability. One drawback to the SoundLink Micro (and all Bose products) is the price tag, which is significantly more expensive than other similarly-sized Bluetooth speakers (see the JBL Clip 2). I would be interested in comparing the JBL Clip 2 to the SoundLink Micro. My suspicion is that the Bose sound would be superior to the JBL, but maybe not by much. Regardless of the pros and cons of this particular product, I highly recommend a Bluetooth speaker for any serious musicians. I’ve used mine so much over the past several months that I replaced my office stereo system at school with a larger Bluetooth speaker, the JBL Charge 3. It’s less portable than the Bose, but since it will primarily stay in my office that’s ok with me.


Equipment Update: Budget Recording Gear for the Classical Musician

Departing a bit from my previous “Equipment Update” posts, this one is not about horns, mouthpieces, or mutes. Instead it is a basic introduction to recording equipment for the classical musician, with some inexpensive, but functional, recommendations. I’ve owned recording equipment of one kind or another since my undergraduate days, starting with a Sony Minidisc recorder paired with a small Sony microphone, and later upgrading to a variety of handheld audio and video recorders manufactured by Sony, Roland, and Zoom. These were all great devices; portable, easy to use and of high enough quality to use for auditions, recital recordings, and YouTube videos.

Recently, however, I began to wonder if it might be possible to purchase individual components and put together a relatively inexpensive system suitable for live classical recording. I knew from the outset that it was neither feasible nor desirable to purchase the high end gear I’ve seen professional engineers use. My purpose was primarily educational (I teach an Introduction to Music Technology class), though I do plan to use my equipment for some future projects. I’m happy to say that for around $300, I succeeded in finding decent components which get the job done at a level equal to, or better than, the handheld devices listed above. So, what will you need if you want to do the same? Here’s a quick rundown.

  • Laptop or Desktop Computer For the amateur (as I most certainly am when it comes to recording equipment), this is probably the single most expensive component. Luckily I already own a slightly older, but still perfectly serviceable, laptop (13-inch MacBook Pro). A desktop computer would be just fine as well, although less portable than a laptop. If you are in the market for a new laptop or desktop, don’t worry about needing lots of computing power for basic recording needs. Games and other graphic-intensive applications require far more RAM and processing speed. My 4 year old laptop runs my recording equipment just fine. In my opinion, either Mac or PC is fine, choose the platform you are most comfortable using.
  • Audio Interface The next piece of essential equipment, the interface serves several functions: it converts the analog signals from your microphones into digital signals that your computer can process, provides phantom power to your microphones, and functions as a preamplifier. They can be relatively cheap (less than $100), or very expensive (thousands of $$). It all depends on what features you want and how many microphone inputs you need. After some searching around and inquiring from knowledgeable sources, I decided on the Focusrite Scarlett 2i2, available for around $150. For my purposes – live solo or chamber music recording in a recital hall – I didn’t think I’d need more than two microphone inputs. I can always upgrade at some point if more inputs become necessary. So far I’ve been very pleased with the Focusrite, it’s sturdy, easy to connect and set up, and functions as advertised.
  • Microphones This is a deep rabbit hole, and my ignorance about them was one of the big reasons I avoided going beyond handheld recording devices. However, after familiarizing myself with the various types (see this tutorial video for a great introduction), I decided to take the plunge and purchase my own. As with audio interfaces, microphones can be had for $100, $1000, or $5000+, depending on the brand, type, and various other technical details. For brass instrument recording there are lots of good options, but I went with a matched pair of small-diaphragm (cardioid pattern) condensers, the Samson C02. These are definitely on the low end of the price spectrum, but they had good reviews and came with stands and cables (these are NOT the microphones pictured at the beginning of this post). Other microphones I considered at a similar price point include the Rode M5 and ART M-Six. There are certainly better microphones out there, but for the money spent, I think I got an excellent value.
  • Software (DAW) The term DAW (Digital Audio Workstation) is generally used now to refer to recording and editing software, but at one point in the not-too-distant past actually meant a separate device or devices. If you’ve been keeping up with the math, you know that I’ve already reached the ca. $300 budget mentioned at the beginning of this post. The great thing about the DAWs I frequently use is that they don’t cost anything, and are fully functional. For several years I’ve used Audacity, a free, open-source DAW that incorporates many of the features of more expensive software. It is user-friendly, and simple to set up with my audio interface. I have also been using Studio One 3 Prime, a free version of the popular Studio One software by PreSonus. GarageBand is free for Mac users, and is another great way to get into the world of DAWs. There are lots of great options out there, many with free trial versions. As a teacher, I prize ease of use pretty highly, and all three of the DAWs mentioned above perform well in that category.

So there you have it, a bare-bones but hopefully useful guide to recording equipment for the classical musician. There are so many other great tutorials online that I felt it unnecessary to go into too much depth about any of the various components. Far more knowledgeable contributors have written and recorded excellent demonstrations on a plethora of recording topics. Among my favorites is a series produced by Murray State University. See below for the links:

If you’re a novice like me, it’s perfectly normal to feel overwhelmed by all of the technical information on recording. However, as a 21st-century teacher and performer I felt I owed it to myself and my students to learn something about technology which has become so ubiquitous. It took me a little while to wrap my head around the basics, but now that I have a grasp on them I’m excited to experiment with different microphone setups and other parameters. If you are curious what the gear mentioned above sounds like, here is a rehearsal recording made using it. The excerpt is from the Trio for Horn, Trombone, and Tuba by Frigyes Hidas, which my colleagues and I will be performing this summer at the International Trombone Festival and the International Horn Symposium. It was recorded in a small classroom using a fairly close X/Y pattern microphone setup. So that you can get a clear sense of how the equipment performed, no editing has been done other than trimming the beginning and end of the clip in Audacity. I’m very pleased with how everything worked, and am looking forward to recording with this equipment in our recital hall and other venues.


A Visit to Gebr. Alexander with Andrew Downing, Part 2

This is the 2nd of a two-part interview with Andrew Downing about his recent visit to the Alexander showroom in Mainz, Germany to hand pick a new Alexander horn. You can read Part 1 here.

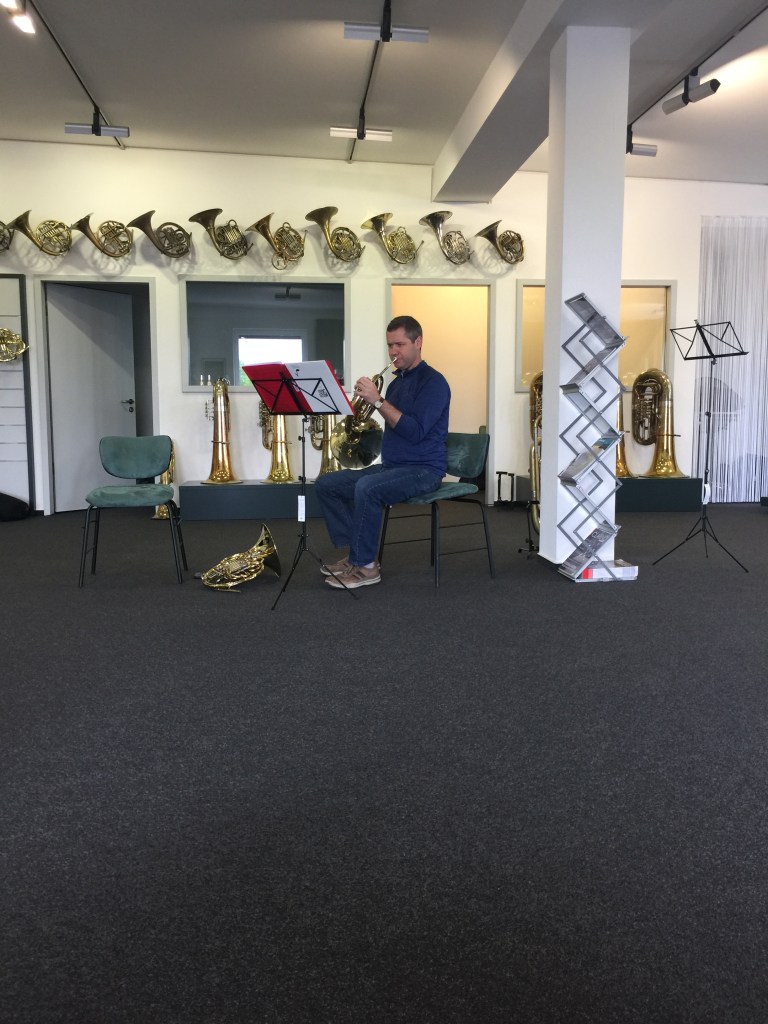
JB: What did you play for your trial on each horn?

AD: I brought a folder of my favorite music that I thought would give me the best representation of my playing. I didn’t bring music that was intentionally flashy but brought things that would demonstrate a high quality of tone, intonation, and articulation. I used the Gliere Concerto as my core demonstration piece as I feel each of the movements are really excellent for demonstration purposes and cover the whole range of the horn. I also brought a few low Kling etudes and a few melodic excerpts from the Brahms and Mahler symphonies.

JB: Besides the consultant, who else was in the showroom with you? Did you feel comfortable playing in the room and for the consultant?

AD: The appointment times for their showroom were strict – each player (or players if travelling together) are seen one at a time for a four hour window. If they exceeded their time, they would be asked to leave and wait until the next client had made their selection. The staff at Alexander works regularly with some of the finest players on earth and they seem intent on giving you privacy unless feedback is requested. My appointment began promptly at 1pm and Reimund began my visit with a walk through their facility. Prior to my appointment time a pair of professional hornists from Italy had not yet made their selections and were forced to leave and wait until I finished! They found a local coffee shop to pass the time and patiently waited for me to finish selecting my instrument. When I began my trials my wife and brother were invited to join me in the showroom. They were given coffee and chocolates to enjoy while I tried the horns – I was jealous! Both are professional horn players and their input was very helpful. My trial experience there was incredibly enjoyable and relaxing overall.

JB: What kinds of feedback did the Alexander consultant provide? Did you find it helpful in making your final decision?

AD: Periodically Reimund would enter the demo space and ask if I wanted feedback. He would turn his back to me and listen to what I would play. When I would finish a passage he would ask me first what I liked or didn’t like and then share his opinion. I ultimately found that we both have different sound preferences – I was seeking a balanced sound that had a certain weight to it and he preferred a brighter sound with pronounced overtones. Ultimately the 1103 has a slightly larger bell and more open wrap that gives the horn the heft that I was looking for. It’s interesting that very few of these models make it to North America as I found it has a nice blend of the Alexander “zing” but is much more closely in line with current trends in American horn design and sound.

JB: Were you surprised by any particular model of horn? In other words, did you have any preconceptions that were disproven?

AD: I had one very common preconception justified through this experience: that many Alexanders of the same model will play very differently. This is common in many other manufacturers of brass instruments so it should come as little surprise. I was really taken by how each horn I tried had a special trait or two but might be limited in another. Ultimately the horn I chose had the best balance of all the characteristics I was seeking. If you are in the market for a new Alexander I would strongly recommend travelling to their workshop or a horn convention to select one. The feel of each was quite different! Alexanders are often generalized as having poor response in the low register but I was really impressed with the brilliance many could make down there. Alexander horns now seem to make a very exciting low sound and many hornists who watch the Berlin Philharmonic on the digital concert hall should find this as no surprise. I have since used my horn for a heavy low horn job and found it no trouble at all.

JB: What horn did you end up choosing? Were you able to take it home right away?

AD: I settled on an un-lacquered yellow brass 1103 with a spun bell. All the horns I tried came with a detachable bell so if someone was seeking a fixed bell option they should communicate that well ahead of time. Alexander does not provide a case but there were a wide assortment of horn cases to select from. Once I made my selection I was given a tour of the manufacturing side and was able to see where the horn was built. I found the freezing process of their bell tails particularly interesting: they fill their unbent spun bell tails with water and freeze them below zero. When bending it give the metal a very consistent shape and it also very eco-friendly. There is an excellent video of this bending process as part of a documentary on making a 103 on YouTube I would highly recommend. [https://www.youtube.com/watch?v=XD3_c05JqNo&t] Here it would stay for two weeks to be finished while I spent time while with my family.

JB: Any other thoughts you would like to share about this experience?

AD: Mouthpiece, mouthpiece, mouthpiece. I should have thought ahead but realized once I began the trials that the leadpipe would not fit my American shank mouthpiece. If you have an American shank and are in the market for a german horn I would highly recommend reading John Ericson’s article regarding the impact of different leadpipe tapers. [http://hornmatters.com/2010/05/european-shank-mouthpieces/] I tried all the horns on a Yamaha 32C4 (my standard mouthpiece for years) but after some trial and error have since settled on a Tilz McWilliam 1 that was specifically designed for an Alexander. In retrospect I would have enjoyed going over with a European shank mouthpiece I was comfortable on. Alexander has a cabinet with hundreds of mouthpieces on site but time is valuable and trying to pair a new mouthpiece with a completely new horn is almost too much for one day.

My final thought is that anyone that plans carefully, creates a realistic savings plan and understands the value of a great instrument can find a way to get a beautiful handmade horn in their hands. Yes, the high end market is expensive these days but there is some magic to having something built, prepared, or even customized for you. In the realm of high end instrument pricing horn players are quite lucky. Woodwind and string players may have to buy instruments that cost as much as a house to play at the highest level: our top of the market is basically equivalent to a used car. The experience of finding your ultimate horn might just be worth that memory of a lifetime!

Andrew Downing lives in suburban Dallas, Texas. He is an active freelance artist and is a member of the Mockingbird Brass, a quintet based in North Texas. More information about him can be found at: http://www.mockingbirdbrass.com/about.html

A Visit to Gebr. Alexander with Andrew Downing, Part 1

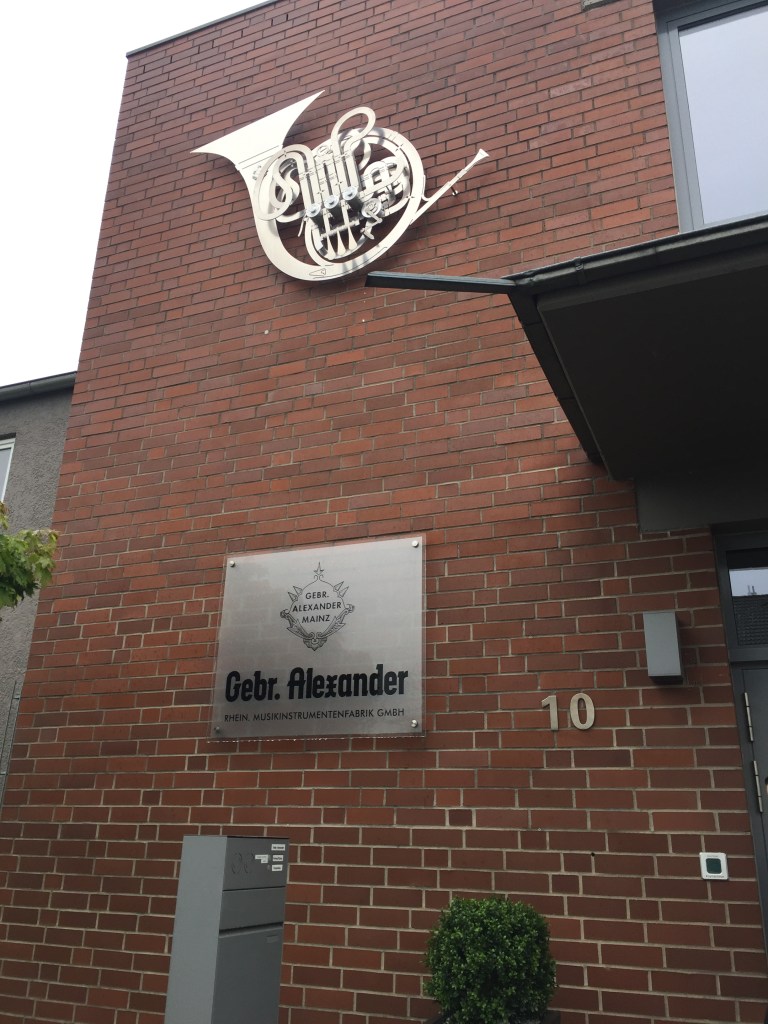
My longtime friend and colleague Andrew Downing recently visited the Gebr. Alexander showroom in Mainz, Germany to hand pick a new horn.  Andy was kind enough to answer some questions about his experiences there. His 2-part interview offers some fascinating insights into Gebr. Alexander’s manufacturing and sales process.

James Boldin: You recently had a rare opportunity for American horn players: visiting the Gebr. Alexander showroom in Mainz, Germany and hand-picking a new horn. Could you give some brief background on how this visit came about?

Andrew Downing: I have a younger brother, Tom Downing, that studied horn throughout high school and chose to enlist in the US Army Band services at the age of 18. Upon leaving the military music school in Norfolk, VA he was given a chance to choose his post and elected to join a band that was stationed at the time in Wiesbaden, Germany. Wiesbaden is a beautiful hillside town across the Rhine from Mainz which is known to most horn players as the home to Gebr. Alexander. Tom served in the Army for many years before his departure to join the American military support work force in Wiesbaden. Tom and his family graciously invited my wife Ashley and I to visit them this spring and I was suddenly facing the chance to visit the legendary Alexander workshop and potentially purchase a new horn. I knew I might have few chances like this in my life and decided to begin creating a savings plan. The VAT tax savings and current exchange rate made the travel worth the effort. The scheduling process took close to a year and began with an email to one of their primary sales managers. Once he confirmed it was possible the planning began.

JB: Why Alexander Horns? Have you always had a special affinity for them?

AD: I spent a few years of my collegiate studies playing on a 1960’s era Alexander model 103 I acquired from a European professional that had moved to the states. I immediately fell in love with the special character of Alexander horns – dark and velvety in softer dynamics and brassy and bright when played loudly. There is an unmatched color they make that seems to encourage many European horn sections to use them down the line to generate a uniform sound. I have always felt that the best Alexanders I’ve played seemed to vibrate in the core of the horn rather than at the embouchure much like the way a great bowed instrument resonates from within. I played many memorable concerts on my old horn and only gave it up in the early 2000’s to get on the Geyer-style horn bandwagon for American auditions and jobs I was taking. It also needed quite a bit of work and I ended up selling it to someone that wanted to invest in the restoration. I have missed it ever since.

JB: Was it difficult to schedule a time and day for the visit? What was the overall customer service experience like?

AD: The sales experience began in the early fall of 2016 with an email to Reimund Pankratz, one of the sales managers for Alexander. He was extremely welcoming to my request and was pleased that I was planning so far out. Reimund took time to discuss my options and talk through the buying process. Once we settled on my instrument preferences we agreed on a set time and date to visit during my trip early on to select a horn. I would then wait about a week and a half for finishing. No deposit was required for the trial and the payment takes place at the time of final selection. All horn trials in their shop are done with their horns in “raw condition” – their term for unfinished brass with much touch up work to do to the finish at solder points. Once my choice was made and I had completed my purchase they would move it to their shop for touch up and customization per my requests. Based upon my experience it seems that the best chance for someone to secure an appointment for a horn trial would be to contact Alexander nine to twelve months prior and attempt to secure a date. They focus on a very private trial experience and their time and space are limited for demos.
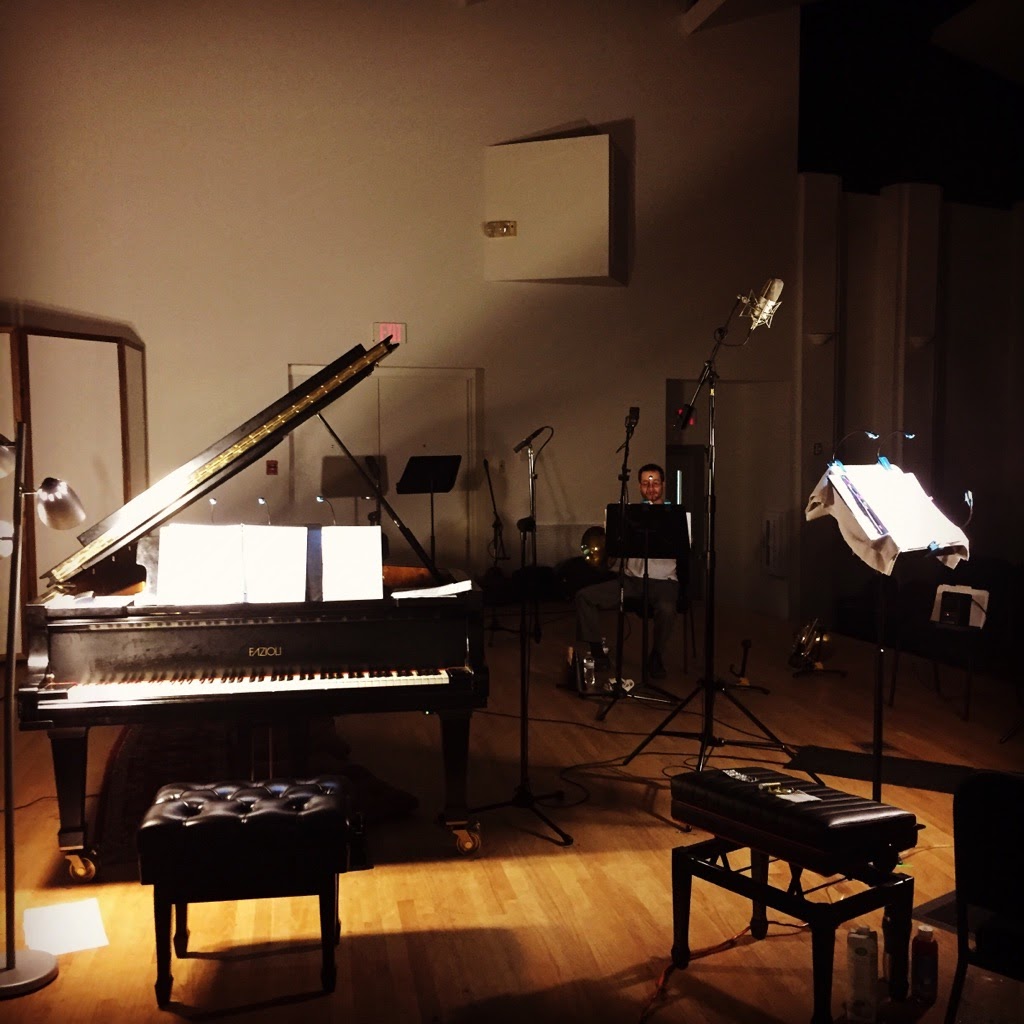
JB: What horns did you try?

AD: Reimund and I discussed the models I wanted to try and settled on the 1103, the Geyer-style or “K Model” as they name it. I chose this because I play quite a few gigs in the Dallas/Fort Worth area and most players here are on Hills/Rauch/Schmids, etc. I wanted to have an instrument that fit more closely with those types of horns than the omnipresent 103. The reason we settled on one model, not many models, is so they could prepare the model of my choice with various options. The 1103 comes in yellow or gold brass, hand-hammered or spun bells, and even cryogenically frozen bells. Alexander makes over a dozen horn models and it’s virtually impossible for them to prep all of their horns in all their options for one visitor. Ultimately they prepared five 1103s for me to try with a variety of features. Anyone that wants to visit should be careful to pick their base model to try prior to beginning the planning process to allow for the widest assortment of options. That being said I also had the chance to play a few 103s, a forthcoming prototype not yet ready for the market and even a Vienna horn! A particularly impressive part of their trial space is their Wagner tuba display. Alexander consulted with Richard Wagner to design the original tubas for the Ring cycle and as a gift he gave the company a handwritten manuscript of Das Rheingold, the first opera in the cycle. A facsimile of the score covers a wall of their showroom.

Andrew Downing lives in suburban Dallas, Texas. He is an active freelance artist and is a member of the Mockingbird Brass, a quintet based in North Texas. More information about him can be found at: http://www.mockingbirdbrass.com/about.html

Coming up in Part 2 of this interview: testing out horns, selecting a horn, and final thoughts.


Recording Project Update: Music by Eurico Carrapatoso

As mentioned in an earlier post, one of my big projects this summer was recording several works for soprano, horn, and piano for a forthcoming album of music by Eurico Carrapatoso. I’m pleased to say that we recently wrapped up recording, and I thought it would be good to share a few observations about the process while details are still fresh in my mind. Thank you to my colleagues Claire Vangelisti and Richard Seiler for inviting me to participate in this project, and Bravo on your inspiring work!

Engineer/Producer: We were very fortunate to be able to work with engineer and producer Richard Price of Candlewood Digital on this project. Mr. Price has a fantastic reputation, and even if 
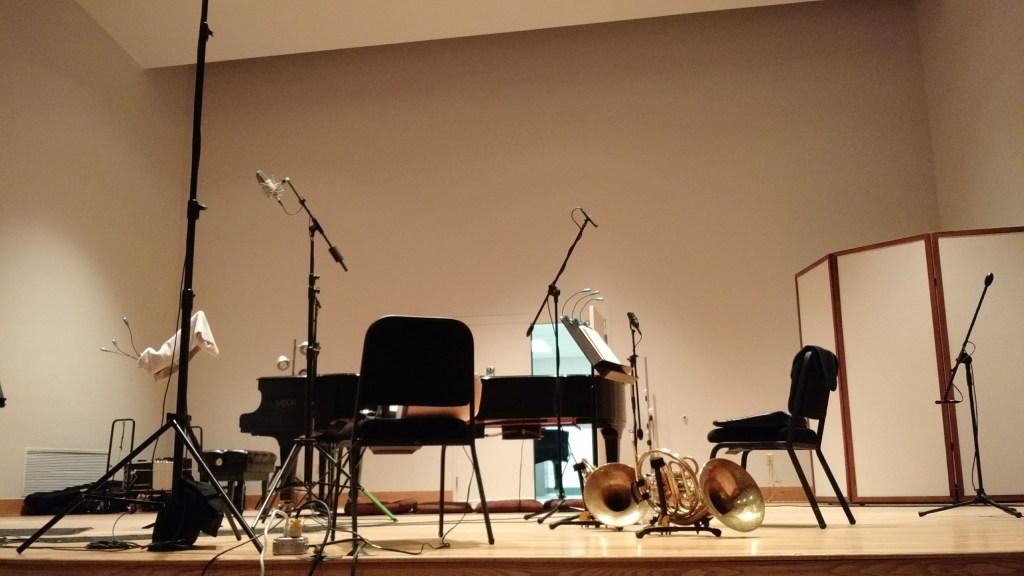
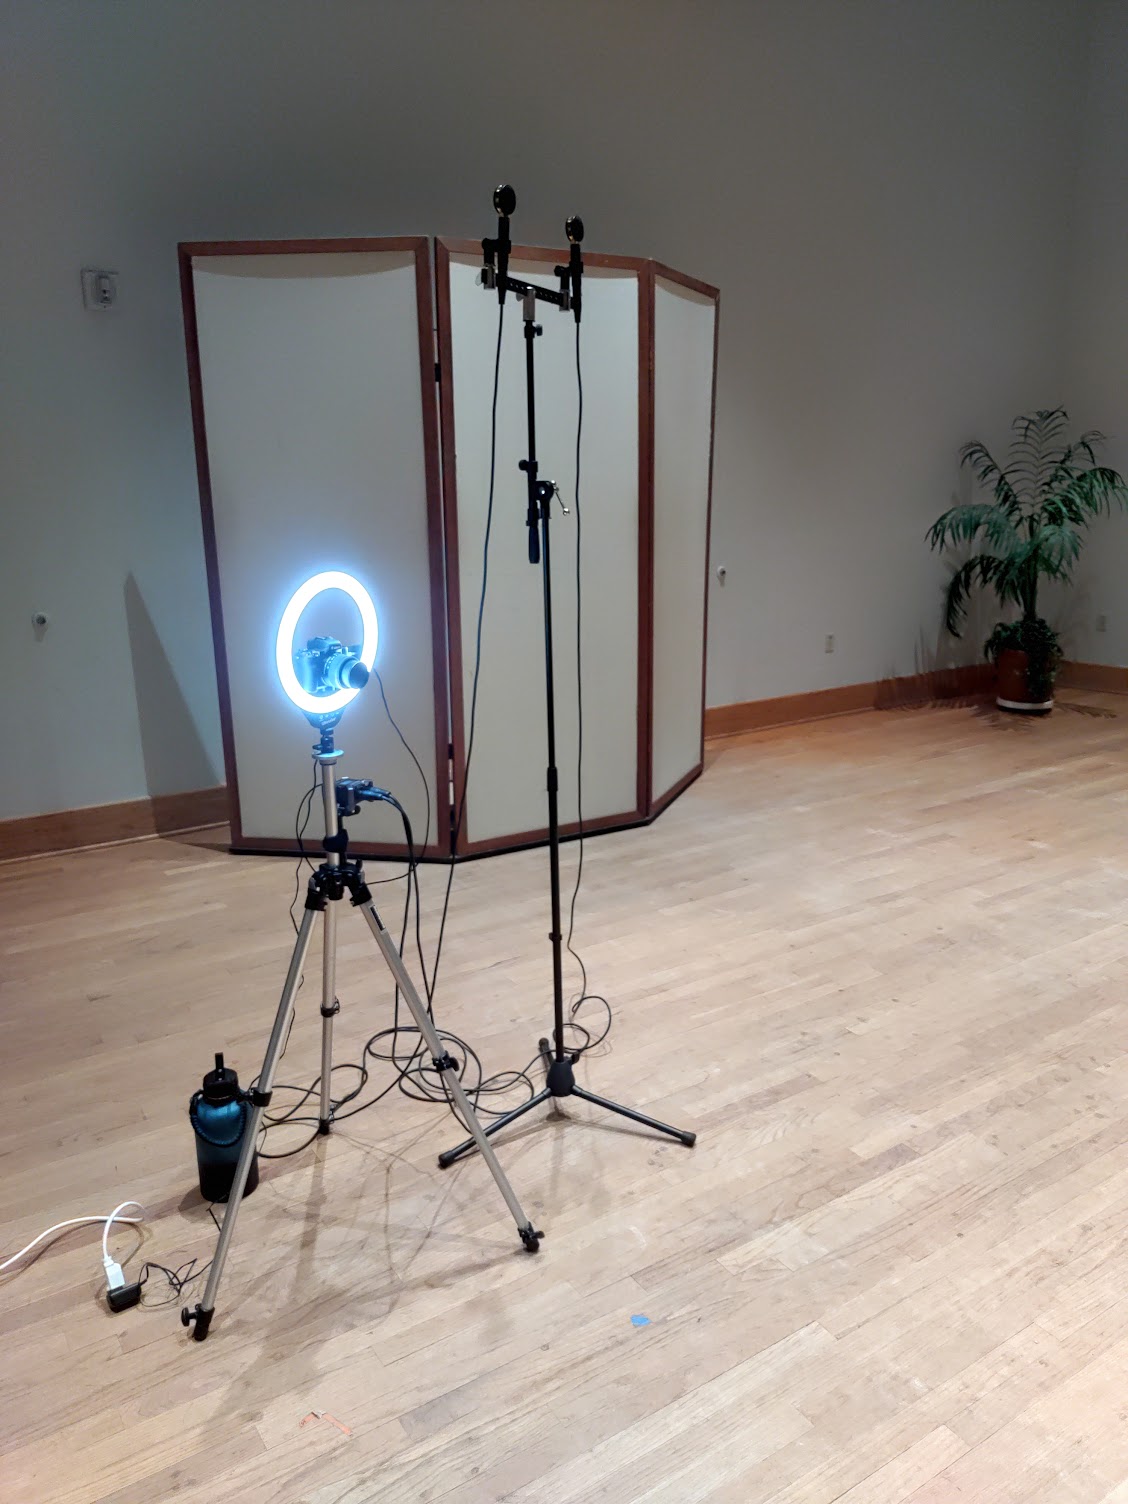
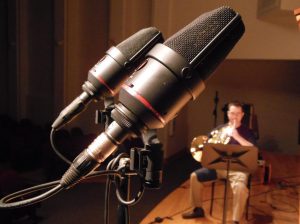
you don’t recognize his name I would be willing to bet that you own or have heard his recordings. I had not worked with Mr. Price previously, but after two solid six-hour-plus days of recording, I would recommend him to anyone without reservation! His incredibly discerning ears and easy-going demeanor made him a joy to work with as a producer and engineer. While I don’t know the exact technical aspects of what he did with microphone placement and other variables, I do know that the sound he was able to capture was great – warm and nuanced, with exactly the right balance among all three parts. And this was just from the raw takes! The final edited and mastered recording should be really fun! See below for a few shots of the stage setup.

Horns, Endurance, and Rehearsals: As I’ve mentioned before, much of this project emphasized high and light playing, for which I used an older Paxman Model 40M double descant horn. My sincere thanks go out to Craig Pratt for the generous loan of this fine instrument! There were a few movements on which I used my regular Yamaha 671 double horn, but the majority of the playing on this album is on the Paxman. In my preparation for the recording sessions I focused on familiarizing myself as much as possible with the tendencies of the instrument, as well as getting creative with some different fingering choices.  Despite the intense schedule (on both days we did a 3-hour session in the morning, followed by a 2.5 hour break, and concluded with another 3-hour session in the afternoon, plus about another 30 minutes on a third day to wrap up some minor things), my endurance held up well. For those that might be interested, I believe this success can be attributed to a few different factors:

  • Balanced practice between double and descant horn It was tempting to cram in lots of practice on the high horn, especially in the days leading up to the recording sessions. However, I can speak from experience that too much intense practice on the High F side can tire out your chops quickly! I didn’t practice more than 25 minutes at a time on the descant horn without a break, and always made sure to end each day on the double horn with some relaxing low register playing.
  • Mindful Warm-Ups/Warm-Downs I crashed and burned once in graduate school by practicing too much on the day of a recording session, and vowed never to make that mistake again. On each day I warmed up very lightly for about 25 minutes, beginning in the mid-low range and gradually expanding outwards (but still avoiding extremes). At the end of each day I warmed down for a few minutes, then followed up with light massage and alternating cool and warm compresses on my cheeks and upper lip for 5-10 minutes after getting home. *The cool “compress” was a soft drink can from the refrigerator, and the warm compress was a washcloth soaked in warm water. I was tempted to try some ibuprofen, but not really being in the habit of taking that type of medication I decided to forgo it in favor of the compresses.
  • Lots of Great Rehearsals One other major factor in the success of this recording was being able to perform and rehearse frequently with my colleagues before starting the recording process. It seems like an obvious assertion, but is probably worth mentioning anyway. Having performed and rehearsed this repertoire frequently just prior to the sessions made things go very smoothly for the most part. Most of our discussions during the actual recording had to do with minor variations in interpretation, and adjusting to the modified stage setup. Because of the sight lines and lighting, I ended giving lots of cues for both piano and voice.

Final Thoughts: Recording a classical album can be a grueling process, and the bar for technical perfection and artistry is extremely high. High quality microphones and a great producer will quickly expose any and all weaknesses in your playing! I’ve always found it a humbling yet enjoyable experience, though distinctly different from the act of live performance. Though a major part of the work is now complete, the project is still a ways off from completion. Now comes the editing, followed by mastering and various other procedures involved in the production of a commercial recording. Be on the lookout for more updates in the coming months!

Descant Horn “Hacks”

I’ve been playing lots of descant horn lately – mostly in preparation for an upcoming recording project, but also for some new music concerts –  and have noted a few tips to improving performance.

Find the Right Mouthpiece: After experimenting with several mouthpiece options on the descant horn, I ultimately found the best results on my regular double horn mouthpiece, a Houser Standley GS12 cup with a Model “E” rim. While models such as the Moosewood BD and Osmun Haydn cup did offer lots of ease in the high register, they just never felt quite right on my face. For me I think it had something to do with not being able to comfortably fit my lips into the very shallow cups on these models. The Standley isn’t a huge mouthpiece either, but slightly larger than the Moosewood or Osmun. However, I would recommend trying out these models (or something similar like a Schilke 29) on a descant to see what you think.

High E-flat Fingerings on the High F Horn: Yes, the descant horn responds easier in the high range, but (at least for me) intonation can be a bit goofy above the staff using conventional high F fingerings. In addition to using a slightly more covered right hand position, I’ve also found that using High E-flat horn fingerings on the High F side works quite well for the A-flat, A, and B-flat above the staff. If you don’t have a high E-flat horn fingering chart handy, the new fingerings would be: T1 for A-flat (instead of T23), T2 for A (instead of T12) and T for B-flat (instead of T1). On the horn I’m using (an earlier model Paxman 40M), these alternate fingerings really sound and feel good. Give them a try yourself.

While these and other tips can certainly improve performance on a descant horn, the best “hack” isn’t a hack at all – lots of practice on the instrument. For practice materials I highly recommend two books: Martin Hackleman’s 21 Characteristic Etudes for High Horn Playing, published by Editions Bim,  and Dr. John Ericson’s Playing Descant and Triple Horns, published by Horn Notes Edition. In addition to etudes and orchestral excerpts, the latter contains lots of helpful hints for high horn playing, including fingering charts for descant (High F and E-flat) and triple horns.

Happy practicing!

Upcoming Projects, Part 2: June Recording Session

cropped-412093_10151188927572199_2111445695_o4.jpgThis is the second in a series of posts about some upcoming activities this semester and beyond. You can read the first one here. In addition to my normal performing and teaching schedule, I’m very excited to be involved in two recording projects, the first slated for June 2017, and the second for January 2018. Here’s a brief description of the first one.


Music of Eurico Carrapatoso: I’m honored to be collaborating with colleagues Claire Vangelisti and Richard Seiler on a recording featuring the music of Portuguese composer Eurico Carrapatoso. Carrapatoso is well known in his native Portugal, and is beginning to get some exposure here in the U.S.  Vangelisti and Seiler will be recording several of his works for voice and piano, and I’ll be joining them for three soprano, horn, and piano works:

  • Duas porcelanas musicais
  • Sete melodias em forma de bruma
  • Dois poemas de Miguel Torga

All three are substantial, multi-movement compositions, with fun (and challenging!) horn parts. I’m planning to write more about the details of this project in a future post, and one interesting challenge for me in the preparation of the music has been the choice of equipment. Carrapatoso’s writing for horn tends to emphasize the high range, with lots of light, lyrical passages above the staff, often in harmony or in counterpoint with the voice. Here’s an example of one from the first movement of his Dois poemas de Miguel Torga:

carrapatoso1

And another one from his Sete melodias em forma de bruma:

carrapatoso2

While certainly playable on a standard double horn, these passages and others like them fit well on a descant horn. We performed the Sete melodias em forma de bruma at the 45th IHS Symposium in Memphis, and for that performance I used a Paxman 40M descant horn, on generous loan from a colleague in the Shreveport Symphony. I’m planning to use that same instrument for our recordings in June, although I’m not entirely sold on which mouthpiece to use. My normal mouthpiece, a Houser GS12, works pretty well, although I’m considering some other options tailored more for the high horn. Updates to come!


Need Rotor Stop Material? Try the O-Ring Store

In this post from several years ago, I discussed the process of changing rotor stops, or “bumpers” as they are sometimes called. It’s a fairly simple, if a little time consuming, process. In the article I mentioned purchasing my rotor stop material from Osmun music. Along with Osmun, there are many other great horn shops out there who sell the material in varying diameters, hardness (duro), and materials. However, another place to check out is the O-Ring Store, a wholesale retailer based in Idaho. Their O-Ring cord stock can be purchased by the foot, in Neoprene, Silicone, Buna-N, among other materials. It is extremely economical to buy rotor stop material this way, as long as you know the diameter you need for your horn, and the type of material you want.

%d bloggers like this: